Recipe: Cookie Truffle

Students learned how to make beautiful, delicious chocolate truffles the artisan way with Maître Chocolatier Luchie Suguitan. She shared a few secrets on how they make Co Chocolat’s much-loved cookie truffles. She also demonstrated professional techniques on how you can make home-made chocolates taste way better than commercial ones while packing nutrition to every bite.
Here's the recipe
Cookie Base
Your cookie base is 60% of your over-all truffle. So a classic cookie dough, that is not overly sweet is ideal. The original recipe called for more sugar, but for a healthier spin, we replaced this with dates.
Here’s what you’ll need:
A. Tools:
- Digital Kitchen Scale from x0.01 (alternatively measuring cups and measuring spoon)
- Rubber Spatula
- Mixing bowl
- Hand mixer (optional)
- Ice cream scooper
- Baking sheet / cookie sheet
- Oven to bake your cookies
B. Ingredients
|
1 |
Butter (Melted) |
1/2 cup |
100 grams |
|
2 |
White Sugar |
1/8 cup |
25 grams |
|
3 |
Dates Chopped (pitted) or Date Paste* |
13pcs. (est.) |
120 grams |
|
4 |
Vanilla |
1 teaspoon |
5 grams |
|
5 |
Eggs |
1pc (large) |
50 grams |
|
6 |
Sea Salt |
1/2 teaspoon |
2.50 grams |
|
7 |
Baking Soda |
1/2 teaspoon |
2.50 grams |
|
8 |
Baking Powder |
1/4 teaspoon |
1.25 grams |
|
9 |
All Purpose Flour (APF) |
1 1/2 cup |
240 grams |
|
10 |
Chocolate Chips from Co Chocolat Chocolatier’s Kit |
1/2 cup |
110 grams |
C. Procedure
- Preheat your oven at 375 degrees Fahrenheit (191 degrees Celsius).
- In a bowl, mix ingredients #01-08. You may use hand mixer to incorporate the date paste well.
- Gradually add #09. Mix well.
- Incorporate #10. Mix well so that all chocolate chips are well distributed.
- Using the ice cream scooper, scoop the cookie dough base and place them evenly spaced on your prepared cookie sheets.
- Bake in a preheated oven for approximately 8-10 minutes. Take them out when they are just BARELY starting to turn brown.
- Let them sit on the baking pan for 2 minutes before removing to cooling rack.
- Set Aside.
![]() Tip: Measuring your baking ingredients using a scale instead of measuring cups (which measure volume) is the best way to ensure the perfect amount of each ingredient. It might seem like a cup is a cup but consider that each ingredient differs in density. It will also make it easier for you to scale up or down on recipes – imagine scaling down an ingredient to a 1/16th of a teaspoon!
Tip: Measuring your baking ingredients using a scale instead of measuring cups (which measure volume) is the best way to ensure the perfect amount of each ingredient. It might seem like a cup is a cup but consider that each ingredient differs in density. It will also make it easier for you to scale up or down on recipes – imagine scaling down an ingredient to a 1/16th of a teaspoon!
Hazelnut Center
The hazelnut center is “the” expected surprise in the middle when you bite into your truffle. The easiest way of preparing this is to simply roast them by the oven, but the recipe I’ll give you below, although optional, is highly recommended.
Here’s what you’ll need:
A. Tools:
- Digital Kitchen Scale from x0.01 (alternatively measuring cups and measuring spoon)
- Rubber Spatula
- Mixing bowl
- Baking sheet / cookie sheet
- Silicone sheet
- Oven to roast your hazelnuts
B. ingredients:
|
1 |
Hazelnuts without skin |
2 cups |
250 grams |
|
2 |
White Sugar or Coconut Sugar |
1/4 cup |
15 grams |
|
3 |
Maple Syrup |
1 Tablespoon |
50 grams |
|
4 |
Salt |
1/4 teaspoon |
1.25 grams |
C. Procedure:
- Preheat your oven at 375 degrees Fahrenheit (191 degrees Celsius)
- In a bowl, mix ingredients #01-04. Coating all the hazelnuts with sugar.
- Place all ingredients in a silicone sheet placed inside the baking sheet. Lay all ingredients flat. This will help with separating the nuts later.
- Bake in a preheated oven for approximately 10-15 minutes or until sugar has caramelized into golden brown.
- Take them out of the oven when done and let cool before separating each nut.
- Set aside.
![]() Tip: It is easier to monitor caramelizing white sugar from getting burnt than the coconut sugar, since changes in the white sugar due to the maillard reaction (a chemical reaction between amino acids and reducing sugars that gives browned food its distinctive flavor) is more apparent than in coconut sugar, which is already dark in color to begin with.
Tip: It is easier to monitor caramelizing white sugar from getting burnt than the coconut sugar, since changes in the white sugar due to the maillard reaction (a chemical reaction between amino acids and reducing sugars that gives browned food its distinctive flavor) is more apparent than in coconut sugar, which is already dark in color to begin with.
Hazelnut Ganache
The ganache we will prepare here will be different from the classic ganache recipe – we will use a lot of dates to replace the usual sugar used in most recipes.
Here’s what you’ll need:
A. Tools:
- Digital Kitchen Scale from x0.01 (alternatively measuring cups and measuring spoon)
- Rubber Spatula
- Mixing bowl
- Hand blender to emulsify all ingredients
B. Ingredients:
|
1 |
Melted Chocolate – from Co Chocolat Chocolatier’s Kit 45% Fine Dark Milk |
1 cup |
240 grams |
|
2 |
Thick Cream or Whipping Cream |
1 cup |
240 grams |
|
3 |
Date Paste |
1 cup |
240 grams |
|
4 |
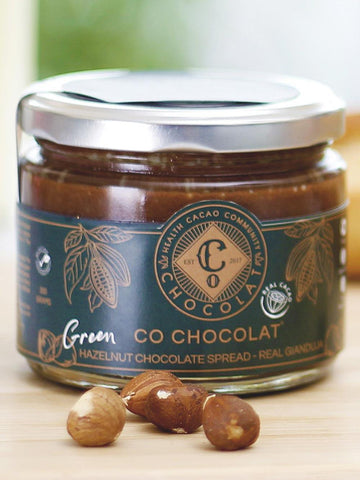
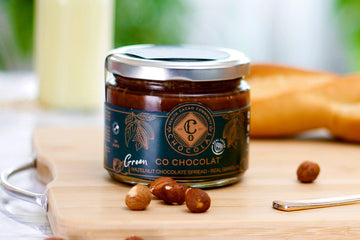
Co Chocolat Hazelnut Gianduja |
2/3 cup |
170 grams |
- In a bowl, mix ingredients #01-04. Use a hand blender to emulsify all ingredients well.
- Set aside.
![]() Tip: If you only have dried dates in your pantry, you can make your own paste using the ratio 1:3.1 portion of water for every 3 portions of dried pitted dates. Bring the water to a simmer, and then add the dried dates, let the dates absorb the water. Using a food processor or hand blender, process until very smooth, scraping down the bowl to make sure all the dates are incorporated. Store the date paste in an airtight container in the fridge for up to two weeks and use it in your favorite healthy recipes.
Tip: If you only have dried dates in your pantry, you can make your own paste using the ratio 1:3.1 portion of water for every 3 portions of dried pitted dates. Bring the water to a simmer, and then add the dried dates, let the dates absorb the water. Using a food processor or hand blender, process until very smooth, scraping down the bowl to make sure all the dates are incorporated. Store the date paste in an airtight container in the fridge for up to two weeks and use it in your favorite healthy recipes.
Assembling the Hazelnut Cookie Truffle
Let’s assemble all the recipes we prepared earlier and roll them into truffles.
Here’s what you’ll need:
A. Tools:
- Truffle Moulds - Although chocolate truffles aren’t meant to be perfectly round in shape, uniformity in size helps with the portioning and coating of truffle. A more uniform-sized truffles make for an easier packaging and presentation. But if you can’t get them where you are, you may go for a mini ice cream scoop or just a spoon and your hands!
- Silicone piping bag with large hole
- Rubber Spatula
- Mixing bowl
|
1 |
Cookie Base |
1 Recipe |
|
2 |
Hazelnut Ganache |
1 Recipe |
|
3 |
Cookie Centers |
1 Recipe |
- In a bowl, mix ingredients #01-02.
- Scoop in a handful of the truffle mixture into a silicone piping bag.
- Pipe in the truffle mixture into the cavity of the mold until almost full.
- Insert 1 candied hazelnut (ingredient #3) in each cavity, all the way to the middle. The addition/insertion of the hazelnut into the cavity would have filled the cavity with the truffle mixture all the way to the top.
- Place the already filled silicone cavity into the freezer. This is necessary so that the truffle mixture solidifies before coating.
![]() Tip: A soft truffle mixture is ideal when using a piping bag, however when using an ice cream scoop or a spoon and hands, it is advisable that you refrigerate your truffle mixture for 10-15 minutes, or just until it solidifies a bit to make scooping and shaping easier and less messy.
Tip: A soft truffle mixture is ideal when using a piping bag, however when using an ice cream scoop or a spoon and hands, it is advisable that you refrigerate your truffle mixture for 10-15 minutes, or just until it solidifies a bit to make scooping and shaping easier and less messy.
| A PDF version of this menu can be downloaded here. |
